Between testing out different approaches to narrative mecha gaming, I thought I would try out the latest offering from NWG, Unity Field Agent.
I got the game while it was in beta but didn't find the time to try it before now, so that needed to be remedied!
For those of you who don't already know, Unity Field Agent is a skirmish game centered around small groups of about 5-15 models per side fighting out on the fringes on human space.
Unlike some of the other NWG rules UFA has a standard statline and a point system for models to allow for standard army lists and encounters, but also have a squad mode for necromunda-style play where you follow a group as they advance between games and a more free-form story mode for narrative games.
The stats are movement, brawl, firing, toughness and morale. The stats are fairly self explanatory, movement is the number of inches a character can move. The other stats have a numerical value between 1+ and 6+ and is used for brawling, firing, resisting damage and morale tests, respectively.
The system uses standard D6s, but have a card-based activation mechanic using a normal deck of cards to determine activations. Each force is assigned a suit in smaller games, or a color in bigger ones, with number cards giving a character 2 actions, face cards giving you 3 actions and aces allowing for 1 action, even if you have already activated earlier in the turn. Finally jokers can be used to advance the game clock and trigger random events if used.
You can also choose to use a card to give a bonus action instead of a regular activation if the character has the appropriate traits.
Another thing that is a bit different with UFA is that you can't repeat actions in the same activation unless you have a double-action trait. So if you have 3 activations you can't move, then shoot and move again in a single activation, unless you have the double-move trait.
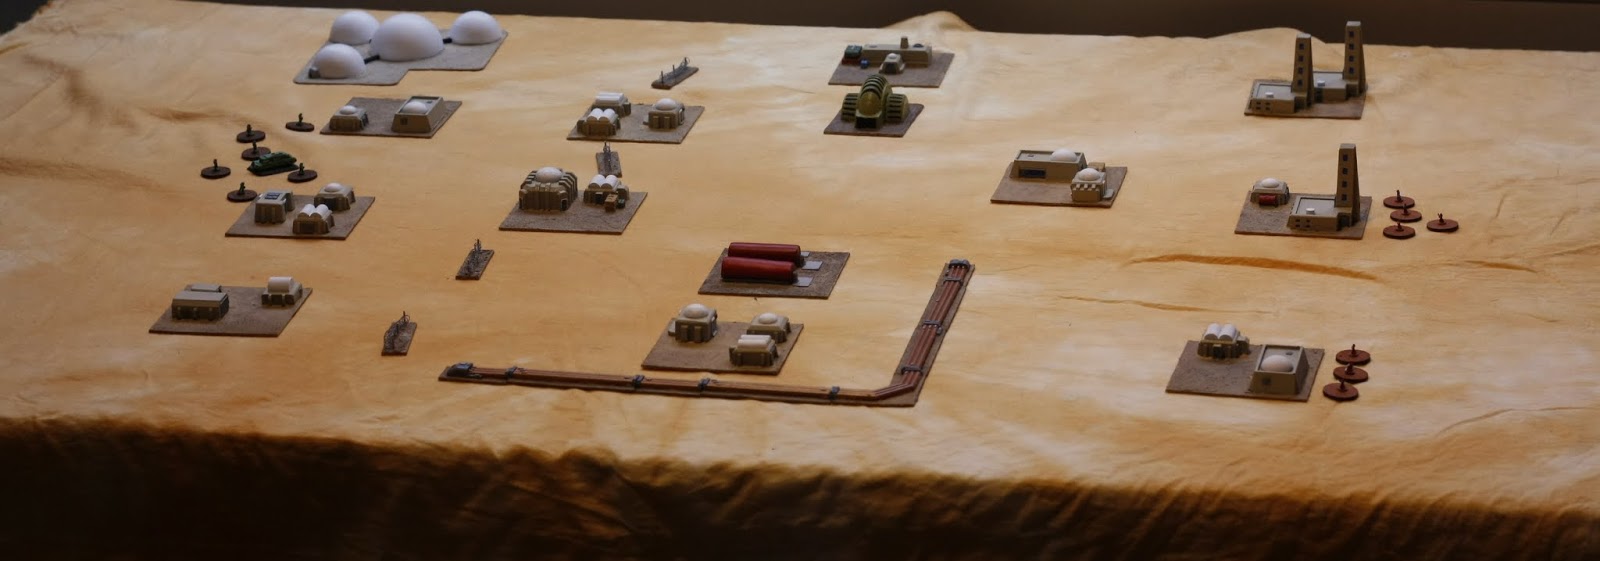
For this game I decided to keep it simple to start with setting up two forces of about 75 points, the smallest suggested size.
In a standard "encounter" game, you set up a number of objectives depending on the agreed upon points. For this game I had two objectives; The red fuel depot and the Generator along the center line. If you are the only one with a character within 2" of an objective at the end of a turn, you receive 1 VP.
The Zephyr peacekeepers; One veteran acting as leader armed with a assault rifle, a soldier with a rattle gun (LMG) and 4 soldiers with rifles. Most characters can make a 5" or 6" move.
The attacking Cultists; One veteran acting as leader armed with a assault rifle, a Bruiser with a maul and a pistol, a heavy cultist with a rattle gun, a scrapper with a auto pistol and 4 cultists with rifles.
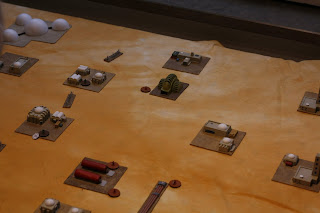
The first turn I learned a important lesson; I need to make the set-up distance smaller, as all the characters spent the turn running towards the objectives and each other.
When a character in UFA decides to take a shot at another, you roll a number of D6's depending on the weapon. Most weapons roll a single die against the characters firing stat as well as a severity dice, in this case 4+. If the target is in the open you need to match or beat it. But if the target is in cover or there is poor visibility or other scenario considerations, you need to roll over the firing stat instead.
The shot hits and then the targeted soldier rolls a toughness roll trying to match or beat his toughness score. Some weapons have a impact score, this gives you a penalty to your tough roll equal to the value. This also means that some weapons can hit hard enough to make your toughness rolls impossible( e.g. a toughness 5+ character being hit by an impact 2 weapon). In this game the only weapon with an impact score is the maul of the cultist bruiser.
If he succeeds, then the shot is deflected but you check the severity dice to see if the target gets shocked. If the toughness roll fails, like in this case, you apply the severity die in full. This soldier was lucky enough to only be wounded, you can take 3 wounds before being taken out of action.
Another shot hits a soldier taking cover amongst the buildings. He is less lucky than his comrade. When you fail a toughness roll, you look at the severity die rolled together with the attack die. On a 1 the character is shocked, pinning him in place and keeping him from taking bonus actions that aren't an attempt to recover.
On a 2 or 3 you are wounded, you take a -1 penalty on all your rolls for every wound and you can take 3 wounds before being taken out of action. But if the severity die shows up 4-6 then the character is instantly taken out. This is what happened here.
Return fire damages the cultist bruiser as he runs across the sands.
Pushed on by the cultist leader, the scrapper reaches the fuel depot before any of the soldiers.
Shots ring out, and the scrapper is taken out by a Zephyr shooter.
Before he has any time to appreciate his fine shot, return fire takes him out as well. The soldier behind him is forced to take a morale test as he was within 4" of the destroyed character. He rolls 2D6 aginst his morale score, comparing them separately. One fail and one pass, forcing him to fall back in search of cover, and takes a shock marker as well.
The onslaught continues, with another soldier falling to cultist fire. This time the cowering soldier passes both dice on his morale test, and stays in place. A character can have a total of 3 shock markers before fleeing the field.
Retribution is swift, as the Zyphyr heavy rakes rattle gun fire at the already damaged cultist bruiser. Since he had previously taken 1 damage, he had to roll 6+ instead of the normal 5+ on his toughness roll, and failed. a 4 on the severity die means he is destroyed outright by the incoming burst.
At the end of the second turn Zephyr holds the generator, scoring 1 VP. They have also destroyed a bruiser and a scrapper, giving them another 4 VP. Destroyed of feeling models award you VP equal to their cost/4 so a bruiser with a cost of 12 is worth 3 VP if destroyed or driven off. The Cultists have isn't in control of any objective, but have destroyed 3 soldiers for a total of 6 VP.
Things are looking a bit hairly for the Zephyrs!
Sprinting into brawling range, the cultist swings at the heavy gunner. Brawling, like with shooting is based on the type of weapon (if any) you use. The cultist is not armed with one, so he rolls a single attack that needs to beat his brawl score. He misses. Deciding to pay back in kind, the gunner swings his gun as an improvised weapon, allowing him a single attack as well. Rolling a 6 to hit and a 5 for severity, he hits and destroys the cultist who fails the toughness roll.
With his remaining action he goes on overwatch, wary of any attempts to rush the objective. Meanwhile the cultists are swarming over the more or less un-protected fuel depot, shooting at the Zephyr leader as they go. The leader uses his activation to rally the shocked trooper. Rather than taking the standard actions when his card comes up, he can rally a friendly model within 8, removing 1 shock marker without a roll required. The leader is not considered activated and may still act later, but this action allows for watching enemies (those on overwatch) to attack him when rallying.
When a cultist rushes up to the objective and into the LoS of the watching heavy, he is allowed to fire at any point during the action. You can react to almost any action exept steps ( a small 1" move you are allowed with most actions in the game) and recover actions. A rattle gun at close range in the open is quite a deadly thing, and the cultist is riddled with bullets before he has a chance to return fire.
The leader of the Zepyhr soldiers now get to activate and wastes no time lining up a shot at a cultist on the edge of the objective. Failing his toughness roll, the cultist is struck down.
When the cultist falls, it forces his two companions to make a morale check since they are close enough to him when he is destroyed. In a streak of rare good luck for the Zephyr troopers, both cultists fail their tests, forcing them to fall back and run away. This also means that they have no more characters in the battle, and the game is over.
Looking at the final score the Zephyr has 2 VP from the objectives and 18 VP for the destroyed and fleeing cultists for a total of 20 VP.
The cultists have 1 VP for objectives, having held the fuel depot for a round and 6 VP for the destroyed soldiers for a total of 7 VP.
A pretty telling victory for the Zyphyr, even if it looked dark for a time there!
Now normaly the game uses a system of "Ticks" to track when a game ends as well as certain random events. Each time a turn ends you shuffle the deck and advance the game clock 1 tick, as well as when a joker is drawn if you so choose and in case of certain events as dictated by scenario or random events if you use them. A good lenght is suggested to be 8 ticks, which would be between 4 and 8 rounds depending on the draw and choices made by the players. This is of course dictates only the maximum lenght of a game, as you check for victory conditions by the end of each turn.
I enjoyed the game, but was initially surprised at how deadly it was, having played a fair bit of Starport Scum recently. With the standard toughness being 5+, even without the heavier weapons that gives a impact penalty and the 4-6 destroyed results means that you'll often take out characters you hit pretty fast. I am all for it, a higher deadliness makes your choices that much more important, knowing the characters can't soak up bullets like a sponge.
Like with almost all NWG games there is a set of optional rules included to modify the experience to fit what you and/or your group is looking for, including dialing down the leathaliy a bit and things like jumping climbing and other adventurous stuff you might not need in every game, but that might be fun to have for some scenarios.
Hope you have liked this AAR, even if it is a bit on the technical side rather than the narrative one I tend to go for.
Til next time!